How to sign an envelope?
Do you want to sign a document that was requested through the Assin platform? Follow the steps below and learn how.
1. Check if you received an email with the subject “Signature Request”. This email informs who requested the document signature. There is also the “Sign Envelope” button. Click on it to sign. If you did not receive this email, ask the requester to verify that the email entered for your signer is correct.
2. Click “Open Envelope”. At this point, you will see the first step of the signing process: check which documents were attached to the envelope. You can view and download the documents. When you click view, you will see the document and its positioned tags (tags are the fill-in fields and can be of the type signature, initials, date, or email).
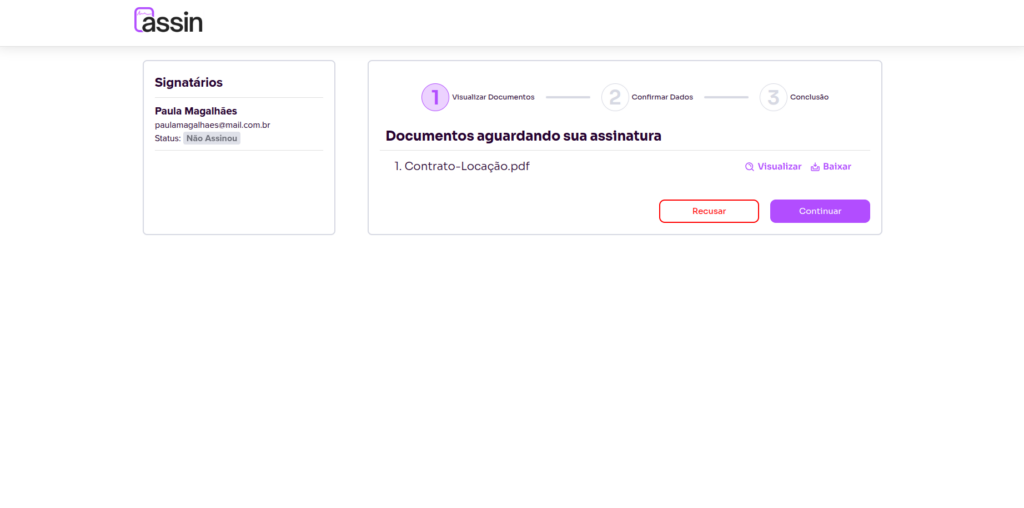
3. After reviewing the documents, click “Continue” to go to the second step.
4. The second step displays your registered personal information, such as name, email, CPF, date of birth, signature, and initials. If any information has not yet been registered, you need to fill it in before proceeding.
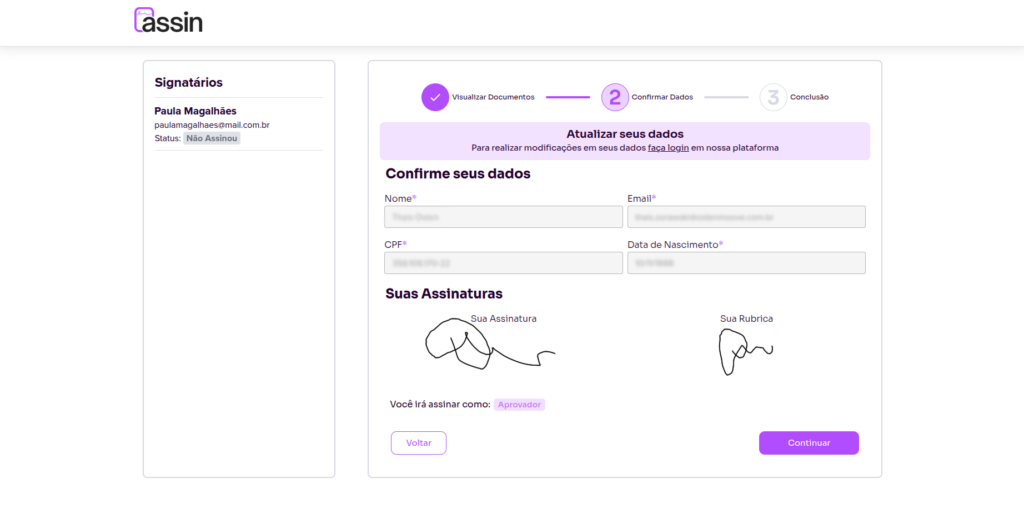
5. After filling in and verifying your data, click “Continue” to go to the last step.
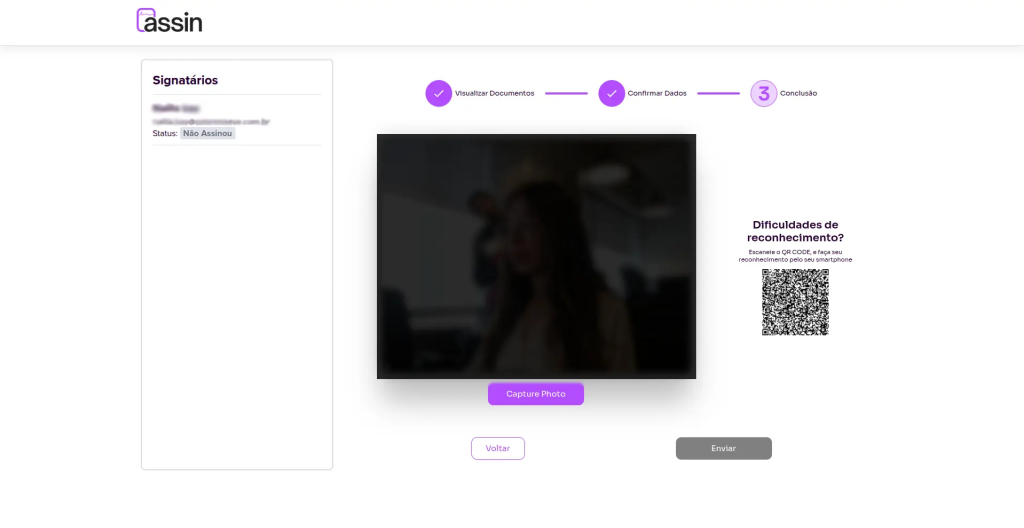
6. The last step is when additional validations are requested, such as facial recognition and email validation. If any of them were requested by the envelope requester, the button will be purple. You must complete the pending validations before continuing. To learn more about facial recognition, see Facial recognition: how does it work? To complete email validation, simply enter the code received in your email.
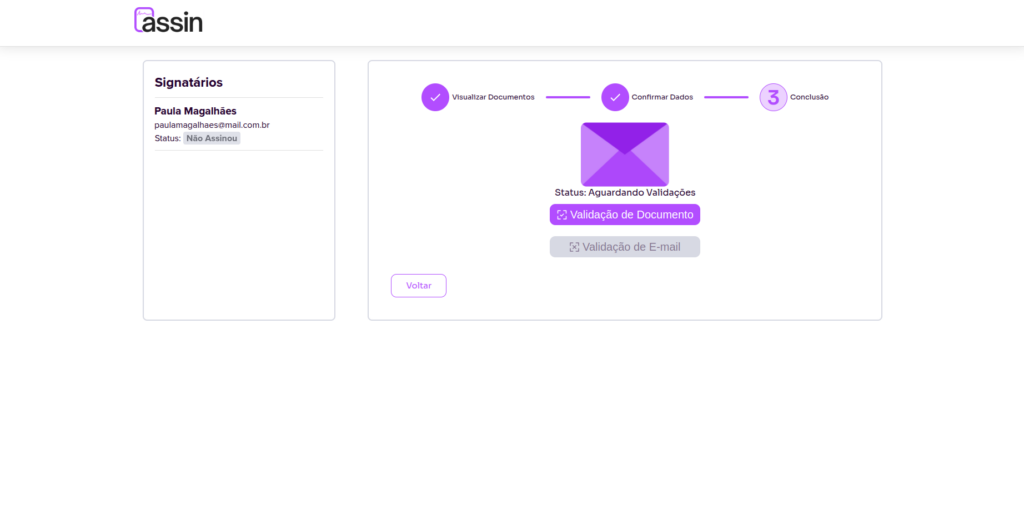
7. If no additional validation was requested or you have already completed the requested validation, click “Validate Data”.
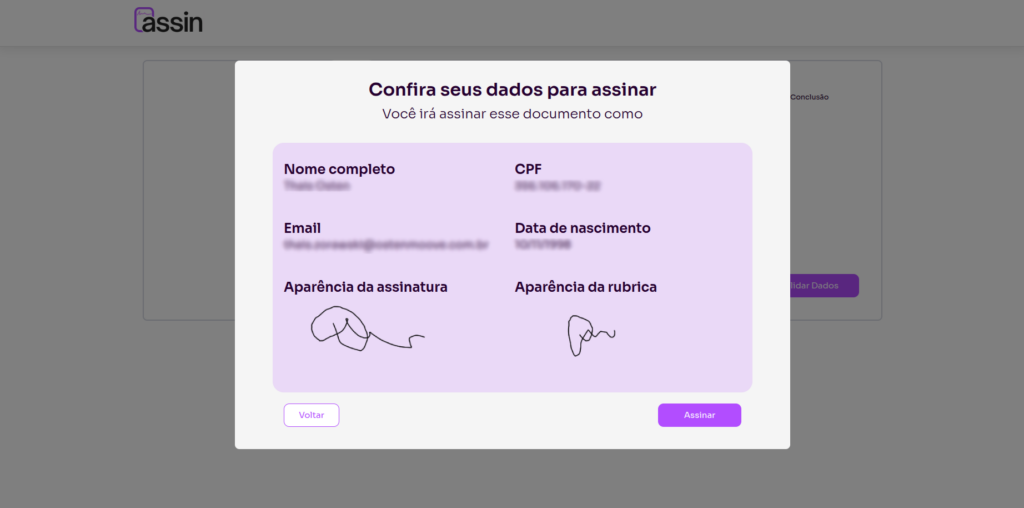
8. Confirm that all data is correct and click “Sign”. And you’re done!
The envelope is signed. Now just wait for the other signers to sign, and then you will receive an email with the final signed version of the document.
Why is it asking for a photo?
This happens when the envelope requester also included an additional facial recognition validation to verify your identity. But don’t worry, it’s very simple! Take a photo of yourself by clicking “Capture Photo”. If the photo didn’t turn out well, you can take another one and click “Send” and you’re done!
If there is a problem with your device’s camera, you can use a phone by scanning the QR Code on the right side of the screen.
Do I have to sign every page of the document?
With Assin, signing is automatic. Just fill in or validate your information and you’re done! When you click sign, all signature fields will be filled in. You don’t need to open the document yourself and sign in every requested location. Leave that to Assin.
For more information, visit our site https://assin.com.br/
See how simple Assin is?
Assin Digital Signature
Was this article helpful?
Thanks for your feedback!