


Signer groups
Do you always sign with the same people (for example, Legal and Finance, or the Board)? Create a signer group once and import it into the envelope with one click, without typing everything again.
Create a group
1. In the side menu, click Signer Groups. The screen lists the groups with the name and the number of members.
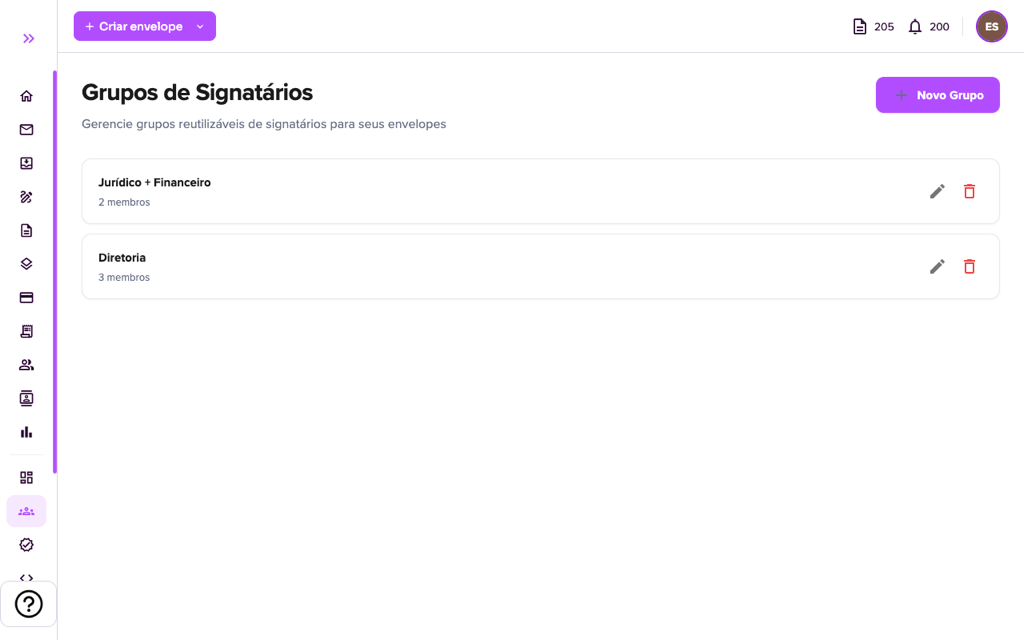
2. Click “New Group”. In the Create Group window, enter the Group name and, under Members, click “Add Member” for each person:
- Full name and E-mail;
- Signature type: Party, Approver, Witness, Client, Seller, Manager, Acknowledgment or Carbon Copy (CC);
- Order: each member’s position in the signing queue (see the signing order in Envelope creation).
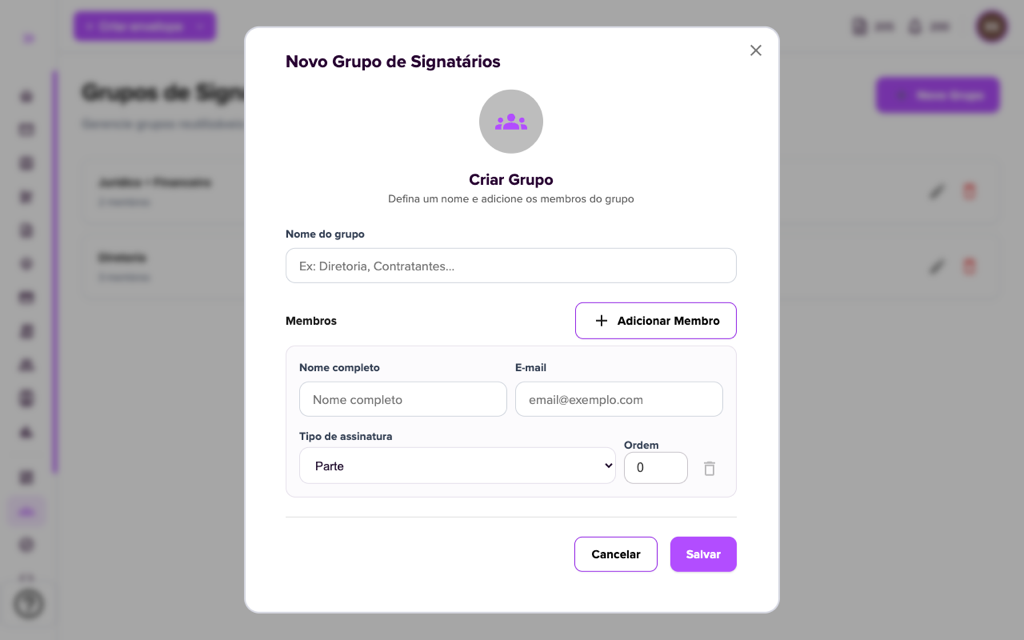
3. Click “Save”.
Edit or delete
In the list, use the pencil to edit the name and members and the trash to delete the group. Deleting a group does not affect envelopes that already used it.
Import the group into an envelope
4. Open the draft envelope, go to Step 2: Signers and click “Import signer group”. Choose the group in the Import Signer Group window.
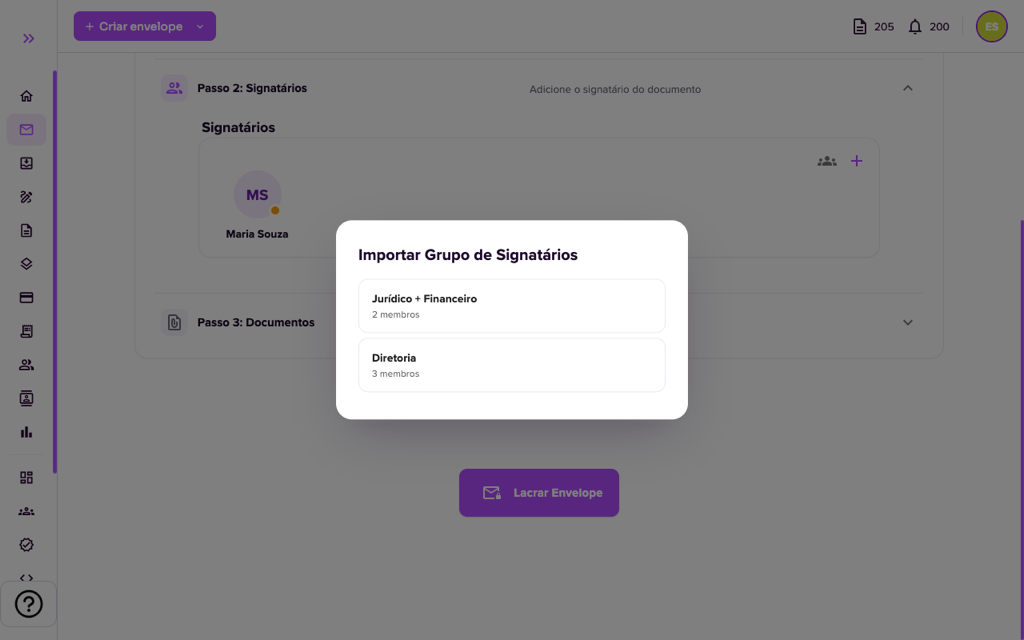
5. Each group member is added to the envelope as a signer, with the type and order defined in the group. You can still edit or remove any of them before sealing.
For more information visit our website https://assin.com.br/
See how simple it is, Assin?
Assin Digital Signature
Was this article helpful?
Thanks for your feedback!